
Manage tickets and conversations
From a ticket’s details page, you can view information about the ticket and collaborate through conversations.
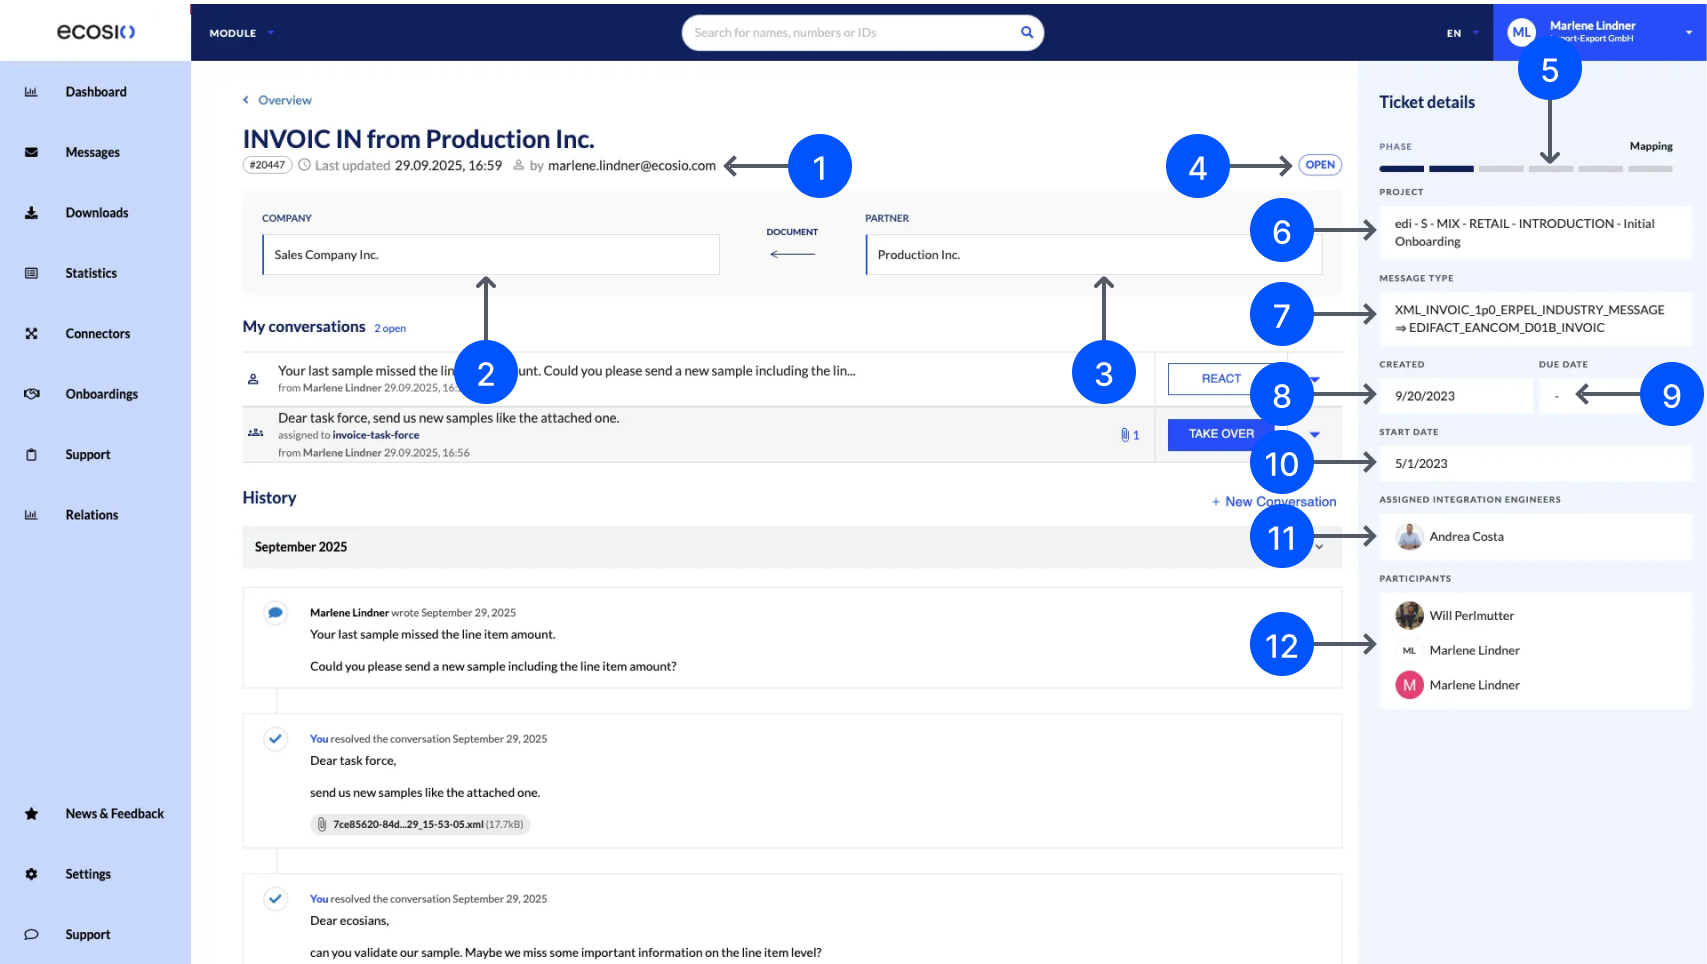
The ticket details page displays the following information:
- Last updated: The date and user who last updated the ticket.
- Company: The parent or sub-company the ticket is for.
- Partner: The EDI partner with whom the ticket establishes a relation.
- Status: The current status of the ticket.
- Phase: The current stage of the ticket's workflow. For more information about phases, see Onboardings overview.
- Project: The name of the project, as defined by ecosio.
- Message type: Details of the type of message for an onboarding project or establishing a protocol connection.
- Created: The date ecosio created the ticket.
- Due date: The target completion date for the ticket.
- Start date: The date that work started on the ticket.
- Assigned Integration Engineers: The ecosio Integration Engineers assigned to the ticket.
- Participants: Everyone involved in the ticket from both your company and ecosio.
Create a conversation
You can create a conversation on the ticket details page and assign it to a colleague or a member of the ecosio team.
To create a new conversation:
-
From a ticket’s details page, select + New Conversation.
-
From the Send to drop-down, select an assignee for the conversation. You can select a colleague, a member of the ecosio team, or a group. The selected assignee will receive an email notification.
-
In the Your comment field, write your comment. You can mention a colleague, a member of the ecosio team, or groups by typing
@followed by their name and then selecting them from the search results. They will receive an email notification. -
Format the text or insert an image:
- To make text bold, select the text, then select .
- To apply italics, select the text, then select .
- To insert an image, select , then browse to select an image to upload.
- You can use markdown syntax. For help with using Markdown, select .
-
(Optional) Select Preview to preview your comment.
-
(Optional) Attach a file by doing one of the following:
- Select the File upload section to browse for and select the file.
- Drag the file into the File upload section.
-
Select Send.
React to a conversation
When a conversation is assigned to you, you can react to it to respond to or resolve the conversation.
To react to a conversation:
- From a ticket’s details page, select React for the conversation you want to react to.
- (Optional) Select Resolve this conversation to mark the conversation as resolved. This permanently closes the conversation, but you can start a new one if required.
- Complete your response by following the steps in Create a conversation.
- Select Send.
Updated 7 days ago